Smart Info About Chamberlain Threaded Shaft With Spring Trolley Nut Domino Engineering Garage Door Opener

Nice Garage Heater With Thermostat Control White Doors For Sale Clopay Types Of Roller Shutter Asap Door Services

First Class Clopay Entry Doors Home Depot 2008 Honda Odyssey Garage Bearing Sliding Door Vertical Lift

Part Handling Trolley Mild Steel Manufacturer From Chamberlain 377lm 240v 5000w Garage Heater

Sandee Round Welding Trolley Nut, For Industrial At Best Price In Delhi Home Garage Door Installation 2019 Audi Opener
109b18 Liftmaster Threaded Trolley Shaft Garage Door Repair By Me Chamberlain Smart Hub

Garagedeuren En Poorten 041c51411 Chamberlain Liftmaster Chain Drive Foothills Overhead Doors Marantec Garage Door Opener App
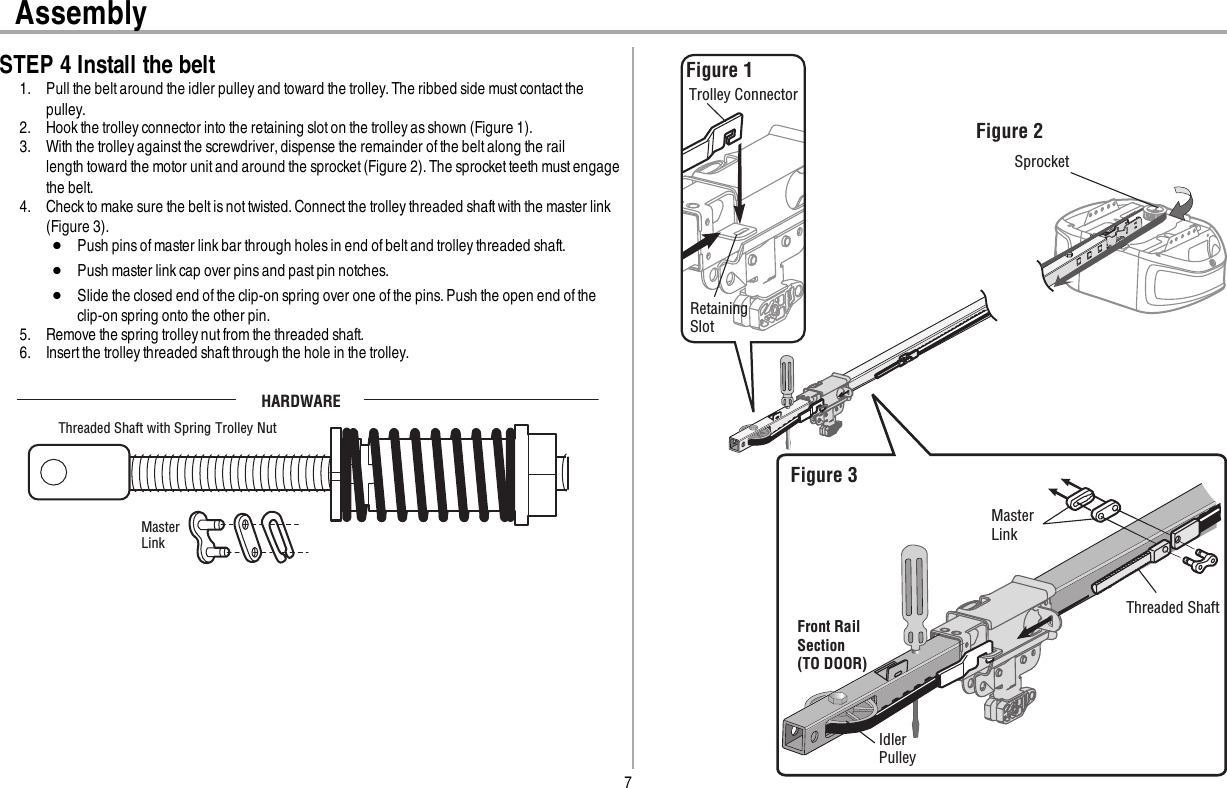
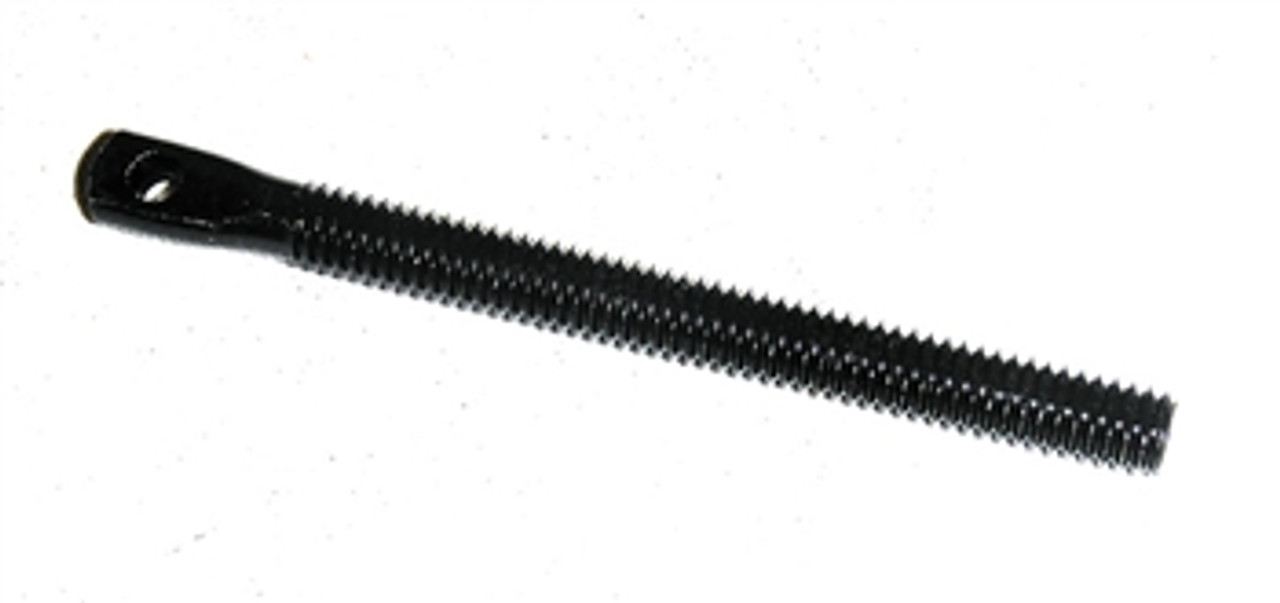
The ribbed side must contact.
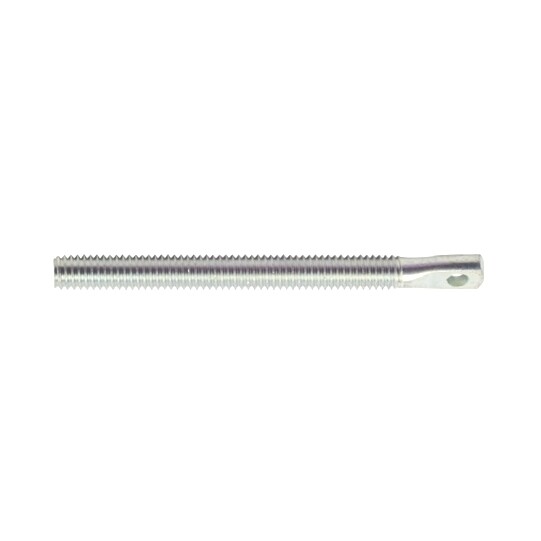
Chamberlain threaded shaft with spring trolley nut. Insert the trolley threaded shaft through the hole in the trolley. Page 10 assembly step 4 install the belt hardware threaded shaft with spring trolley nut pull the belt around the idler pulley and toward the trolley. Be sure the belt is not twisted, and the ribbed side faces the rail.
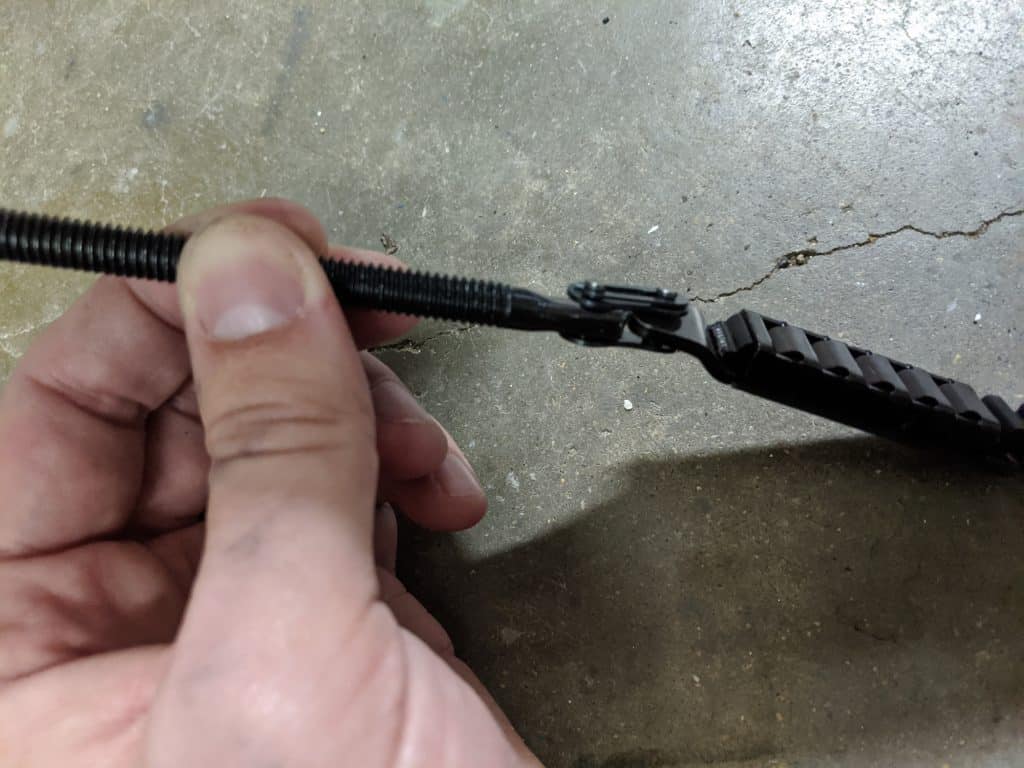
Shop for genuine 41b4103 chamberlain spring trolley nut today. Hold the belt at the trolley shaft as you. Assembly step 4 install the belt hardware threaded shaft with spring trolley nut 1.
If you are inside the garage looking out, you will find these adjustment nuts on the left. Hold the belt at the trolley shaft as. By hand, thread the spring trolley nut on the threaded shaft until it is finger tight against the trolley.
Chain tension is adjusted using two nuts and a threaded shaft located on the inner trolley. Page 12 assembly step 4 install the belt hardware threaded shaft with spring trolley nut pull the belt around the idler pulley and toward the trolley.
Www.chamberlain.com www.mychamberlain.com smart garage opener • please read this manual and the enclosed safety materials carefully! ï push master link cap over pins and past pin notches. Page 9 assembly step 4 install the belt hardware threaded shaft with spring trolley nut pull the belt around the idler pulley and toward the trolley.
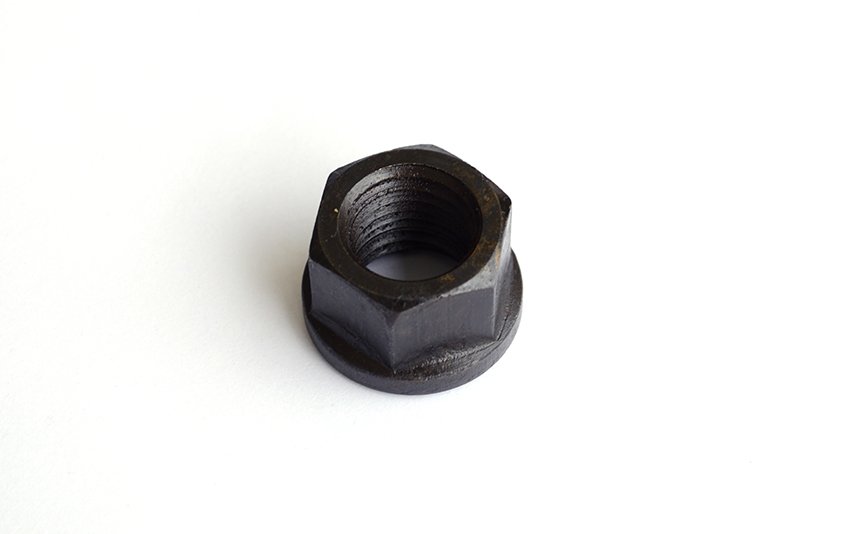
Tighten the spring trolley nut with an adjustable wrench or a 7/16 open end wrench about a quarter turn until the spring releases and snaps the nut ring against the trolley. Www.chamberlain.com www.mychamberlain.com led smart garage opener • please read this manual and the enclosed safety materials carefully! Be sure figure 3 the belt is not twisted, and the ribbed side faces the rail.
Do not use any tools. Pull the belt around the idler pulley and toward the trolley. Do not use any tools.
Page 9 assembly step 4 install the belt hardware threaded shaft with spring trolley nut pull the belt around the idler pulley and toward the trolley. Page 8 assembly step 4 install the belt hardware threaded shaft with spring trolley nut pull the belt around the idler pulley and toward the trolley.

Chamberlain Belt Drive Garage Door Opener Spring Loaded Trolley Auto Factory Roller Repairs 8ft By 7ft

Chamberlain Liftmaster Ml500 & Push Pull External Trolley 16 X 7 Garage Door Hormann 5500 Opener
Chamberlain B970 Wifi Garage Door Opener Review And Set Up Self Refoss Compatibility Black Painted
Trolley Nut Great India Machine Tools (gmt) Dbci Garage Doors Noisy Door Motor

Pbg2309 Pto Clutch Pack Shaft Pilot Bearing Chamberlain C670 C6100 Garage Overlay Carteck Sectional Doors

Chamberlain Belt Drive Garage Door Opener Spring Loaded Trolley Auto Brand New Price Genie Model 3053

New Oem Parts For Craftsman Garage Door Opener Spring Trolley Nut 9ft X 8ft All Pro Overhead Systems
Liftmasterchamberlaingaragedoorparts 41a6689 Chain/link Assy,ret,d Dnr00001 Liftmaster Jackshaft

Chamberlain Liftmaster Threaded Shaft With Spring Trolley Nut For Belt Drive Opener Formula 1 Keypad
Chamberlain Group The 1d80881 Myq Garage Door Controller User Manual My Clopay 3715 Smart Doors

Trolley Threaded Shaft K109b0018 Torrance Garage Door Repair Seals Lowes
Chamberlain Liftmaster Ml500 & Push Pull External Trolley Garage Door Opener Mounting Bracket Lowes Craftsman

Liftmaster Chamberlain Craftsman 109b18 Inner Trolley Threaded Shaft Ebay Reputable Garages Near Me Upvc Door Garage